Virtual ESL Career Week Jobs Board
What opportunities are available for ESL teachers in the USA? Off2Class works with public and...
5 min read
Share this post
Off2Class is excited to announce our new Courses feature, which will help you create and customize courses, and efficiently assign customized courses to your students.
We believe that improving English Language Learning outcomes starts with saving teachers time. Team member Christine walks through the Courses Feature in this video:
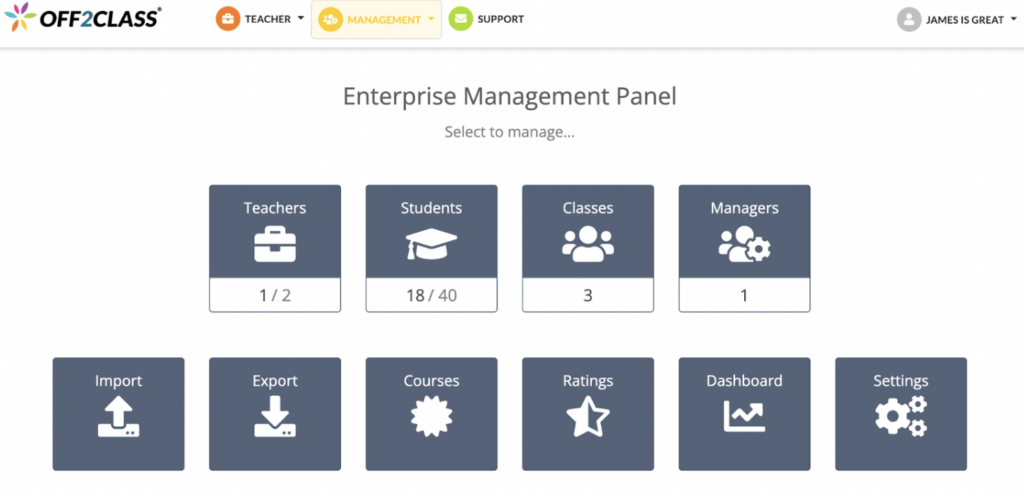
Let’s take a look at the Courses feature! To access this feature, you must have the role of Manager in the account.
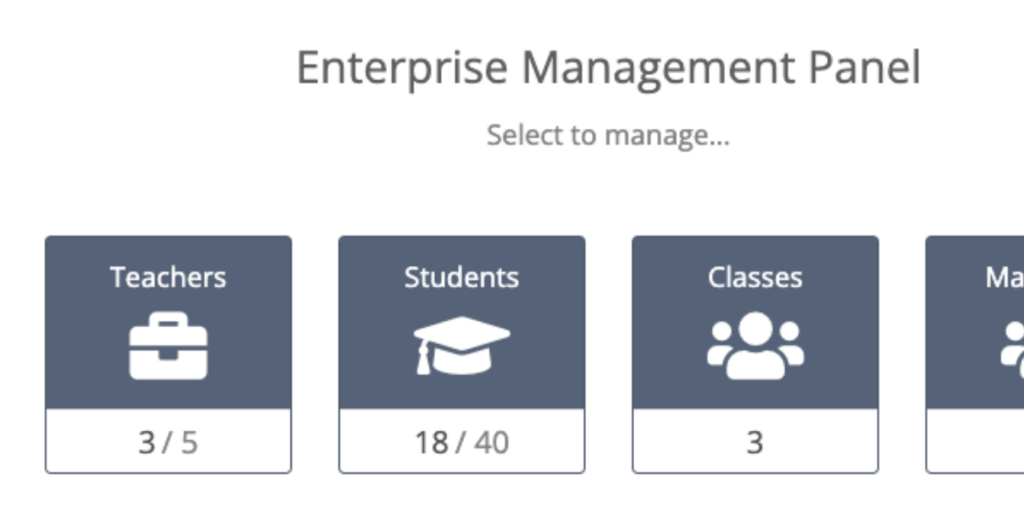
1. Go to the Enterprise Management Panel to access the Courses feature.
2. When you click on Courses, you will be taken to the Courses Panel.
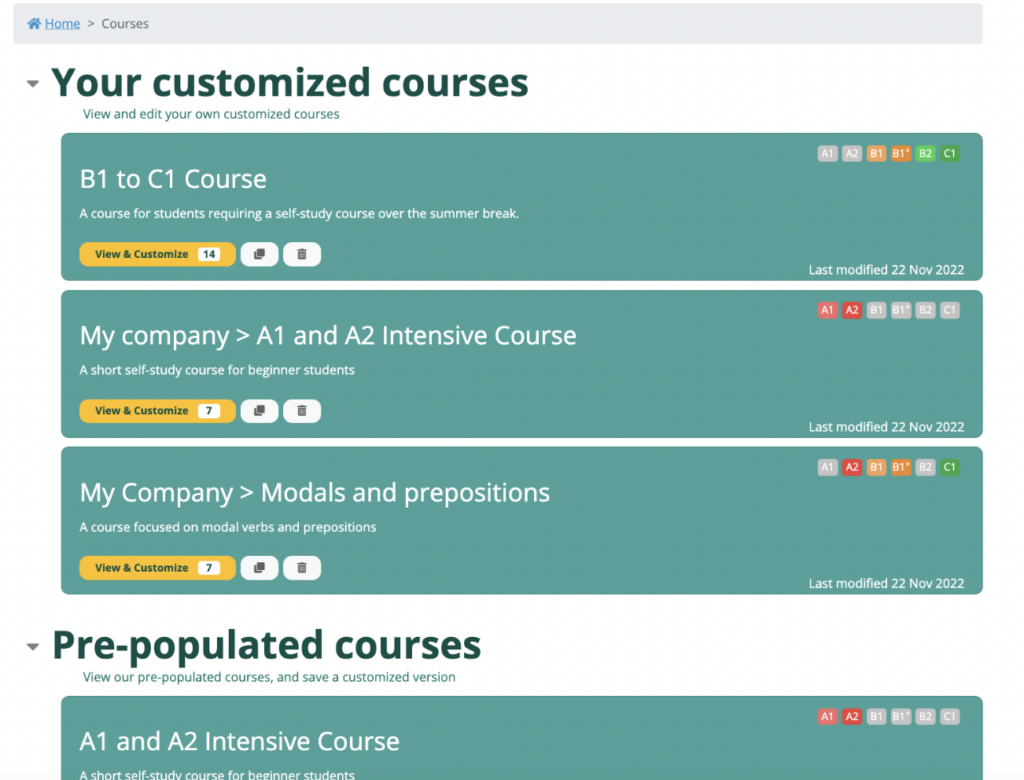
3. Customized Courses are displayed at the top, whilst Pre-populated Courses are displayed underneath. Information about each course is displayed on a card. Information such as the Course Title, Course Description, CEFR levels and the number of lessons are displayed. You can also see action buttons, such as View, View and Customize, Duplicate and Delete.
Pre-populated Courses contain our most frequently used lessons. The Content team has created these base courses to help save your time.
Customized Courses are Courses that belong to your Enterprise. Any course can be customized, and only Customized Courses can be used for Bulk Enrollments via the Enterprise Management Panel.
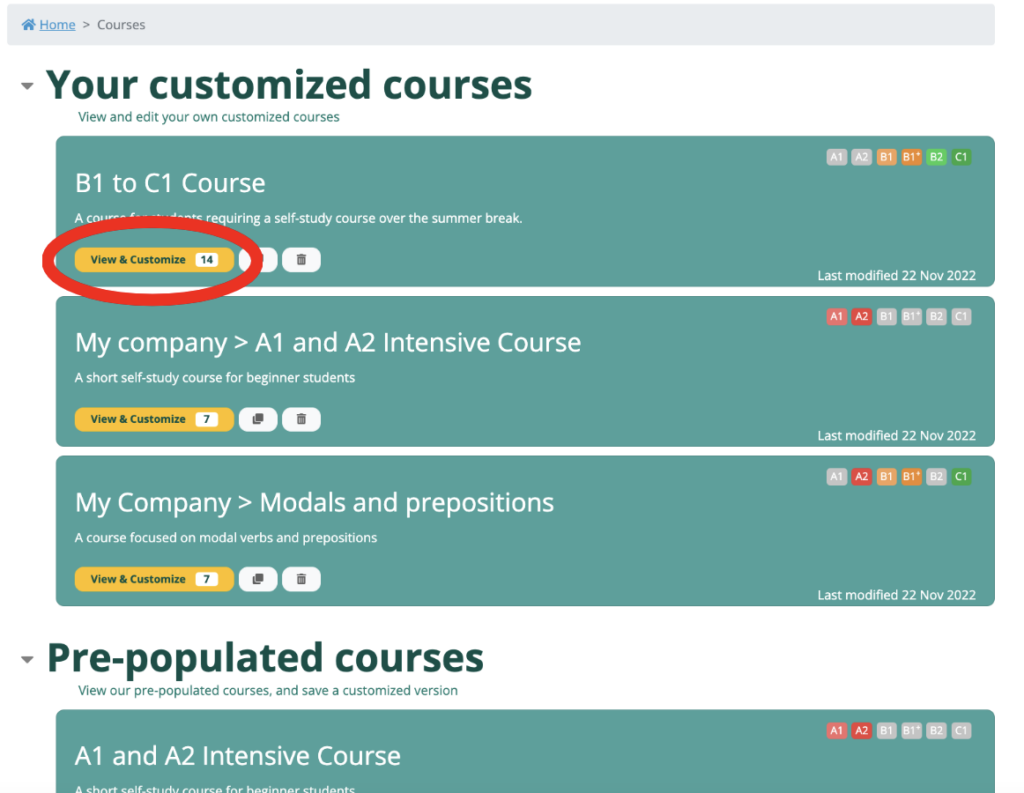
To see a Course in greater detail, click on the yellow action button on the Course Card in the Courses Panel.
This will take you to a page where you can see the entire Course Sequence on the right, and the Search, Filter and Select functionality on the left.
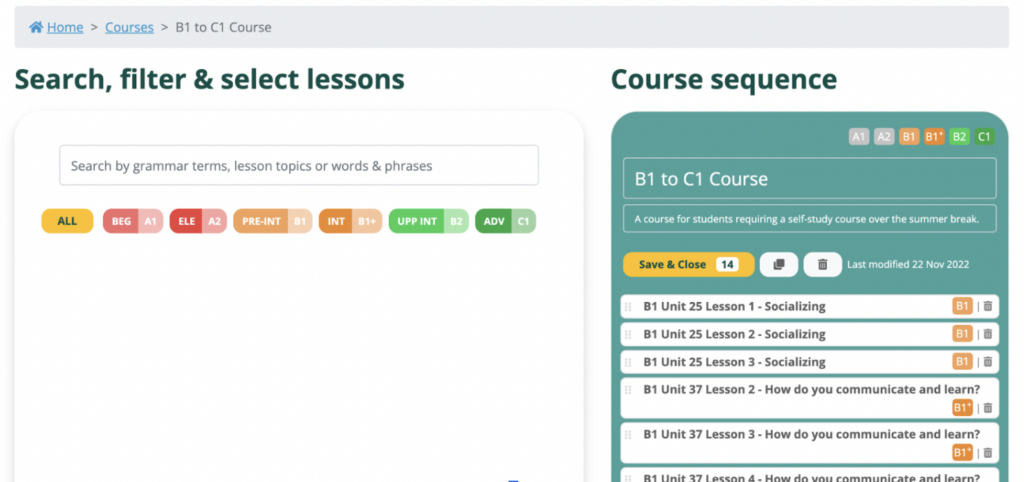
To search the entire Off2Class lesson library, use the search bar and the filter.
When you add a lesson, the lesson appears at the bottom of the course sequence. You can click and drag the lessons in the course sequence to reorder the lessons.
Ensure you click Save & Close when you have finished making changes to the course.
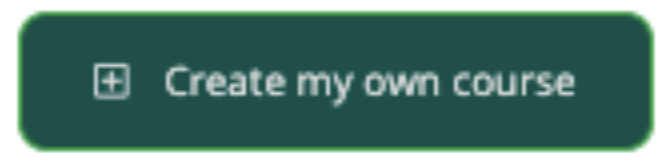
To create your own Customized Courses, scroll to the bottom of the Courses Panel, and click on the Create My Own Course button. Add a Course Title and corresponding Course Description, and you’re good to go! Once you click save, this course will appear in your list of Customized Courses.
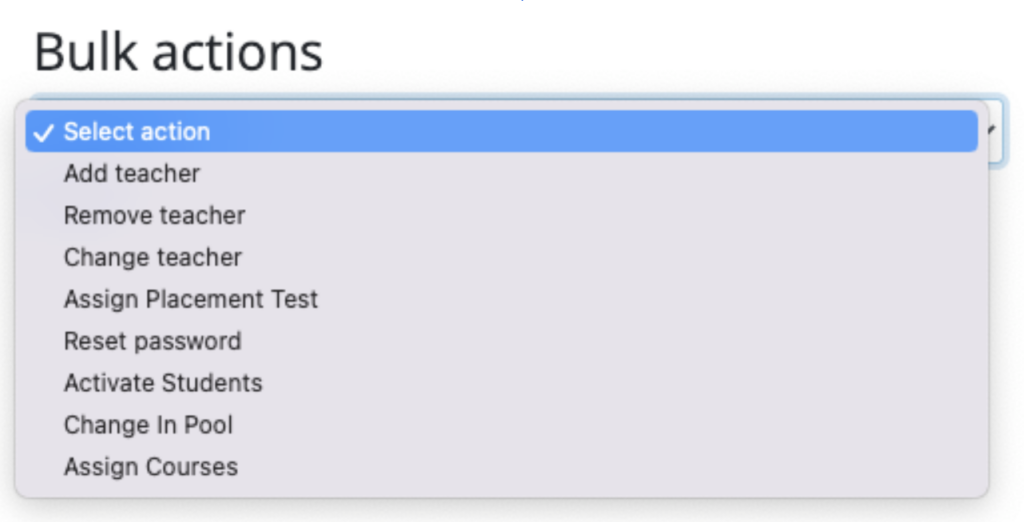
Assign Courses is one of the Bulk Options available from both the Students and the Classes icons.
Whether you click on Students or Classes, the functionality is the same. Here is a demo of the functionality via the Classes icon.
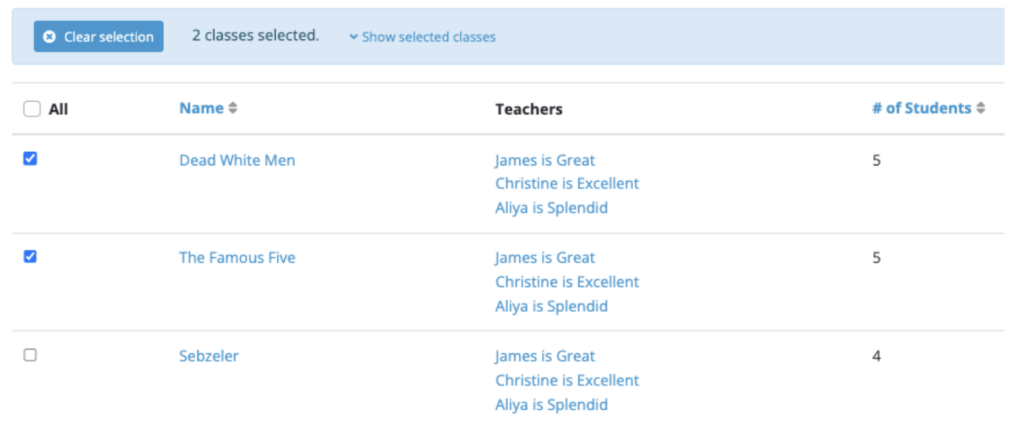
1. From the Bulk Action dropdown menu, select Assign Courses.
2. Then, select the classes you want to assign courses to, and click Submit.
3. This will take you to the Add Course page. From here, select the teacher or teachers and the course.
4. Once you click Apply, all students in the appropriate classes will be enrolled in the lessons and homework for all lessons in the selected course.
Ultimately, how you use the Off2Class Courses Feature will depend on your circumstances. Our experience says you’ll be surprised and delighted to see the results. We made them for you because our mission is to support teachers and districts, and we can’t wait to see what you come up with. As with everything we release, expect improvements and additions as time goes on. Feel free to leave a comment below!
Share this post


Leave a Reply